


If you run a laser cutting business, you know how crucial all the small details are. One wrong measurement, one slightly incorrect setting, and the whole project is ruined.
So why is it that so many laser cutting shops still use a super simple "Name, Email, Tell Us Everything" form? When a potential customer visits your site, they want a quote for a specific job, they know their material, their thickness, and they have a file.
If your form doesn’t ask for the right requirements up front, strong prospects slip away and your team loses time sorting through incomplete or unusable submissions.
In this blog, we’re going to talk about how to fix that. We'll show you how to build a smart, simple lead form that asks the right questions in the right way.
What Is a Laser Cutting Lead Generation Form?
A laser cutting lead generation form is the page or pop-up on your website where potential customers submit project details so you can quote or follow up. It’s usually the bridge between “I’m browsing” and “I’m ready to talk about a part or project.”
For a laser cutting or fabrication shop, this form serves as a part intake form, a sales filter, and a quoting shortcut.
What It Does For Your Business?
- Captures real project info: The form collects material, thickness, quantities, file uploads (DXF, DWG, STEP, etc.), delivery needs, and sometimes tolerances or finishing requirements. That means your estimators start with context instead of chasing details in five follow-up emails.
- Filters out poor-fit or “shopping around” requests: By asking a few smart qualifying questions (e.g., “Are you a one-time buyer or an ongoing production partner?” or “Estimated annual volume?”), you can quickly see which leads deserve immediate attention.
- Organizes leads for a long sales cycle: Industrial and manufacturing leads often involve multiple stakeholders and longer timelines than consumers. A structured form feeds clean data into your CRM so you can track, follow up, and close over weeks or months.
- Reduces quoting friction: When your form guides the customer to upload usable files, choose materials from a list, and specify quantities clearly, you cut down on back-and-forth and quote faster. Faster, accurate quotes win more jobs.
Ready to cut wasted time and quote only real jobs?
Upgrade your lead form and start receiving production-ready RFQs.

How to Create Effective Laser Cutting Lead Generation Forms?
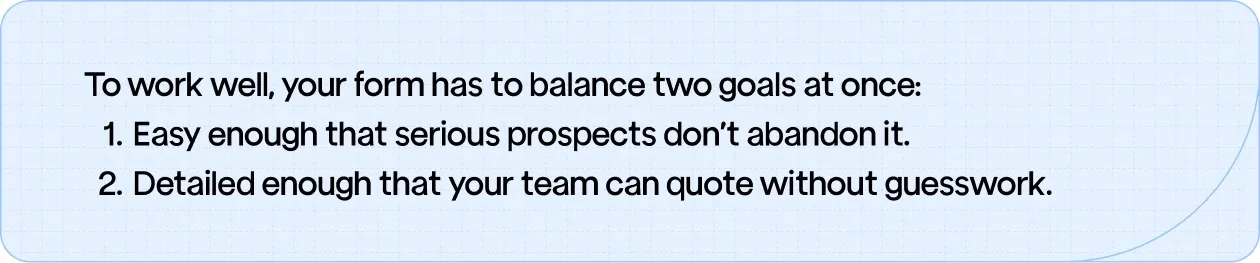
A high-performing laser cutting lead generation form filters, qualifies, and accelerates quoting. Optimize the experience, and your form becomes a revenue engine instead of a basic contact page.
1. Start Simple, Then Expand with Conditional Fields
Many buyers abandon forms because they’re overwhelmed at the first step. Instead of showing every question at once, use conditional logic to reveal details gradually.
How to execute this:
- Step 1: Basic contact fields (Name, Email, Phone)
- Step 2: Project details (Material, Thickness, Quantity)
- Step 3: Upload files only if they confirm they have drawings
- Step 4: Notes for advanced specs only if needed
This keeps serious engineers engaged and prevents casual requesters from quitting early.
2. Use Clear Material & Thickness Dropdowns
Leaving fields fully open-ended leads to vague submissions like “metal, 3-ish mm?” or “steel plate.” Structured dropdowns improve accuracy and speed.
How to execute this:
- Material dropdown: Mild Steel, Stainless, Aluminum, Brass, Copper, Acrylic, Polycarbonate, Other
- Thickness dropdown with predefined ranges
- Finish options: Raw, Powder-coat ready, Polished, Deburred, etc.
This minimizes clarification emails and supports faster quoting.
3. Make File Upload Effortless
If your upload tool is clunky, slow, or rejects standard part files, you’ll lose high-value leads instantly.
Best practices:
- Allow drag-and-drop and batch uploading
- Support DXF, DWG, STEP, IGES, PDF, and ZIP
- Show file size and file-type limits clearly
- Offer cloud upload support (Dropbox, Drive, OneDrive)
Add a clear line: “Don’t have CAD files? Upload photos or sketches and we’ll help evaluate options.” This keeps hobbyists and prototype customers from bouncing.
4. Use Pre-Qualification Questions to Prioritize Real Buyers
Not every form submission deserves the same response time. A few smart questions help your team rank leads.
Examples:
- Project type: Prototype / Short-run / Production
- Estimated timeline: ASAP / This week / This month / Just exploring
- Estimated volume: 1–10 / 10–100 / 100+
These inputs improve workload planning and help route enterprise accounts to sales instead of general support.
5. Add Microcopy that Reduces Hesitation
Short explanatory text near fields increases completions and decreases confusion.
Helpful microcopy examples:
- Next to upload box: “Upload drawings or images, any format is fine.”
- Near timeline: “If you’re unsure, pick your best guess.”
- Near CTA button: “We’ll respond within 24 hours.”
Small explanations reduce anxiety and increase trust.
6. Optimize for Mobile First
Engineers and purchasing teams often browse supplier options on their phones, even if they upload files later from desktop.
Checklist:
- Buttons large enough to tap easily
- Single-column layout
- Autofill enabled for fields like name, email, phone
- A fixed “Call Now” button for urgent jobs
If your form relies on desktop-only interaction, you’re losing leads daily.
7. Add Trust Elements Near the Form
People hesitate to share information when they aren’t sure who’s on the other end.
What to include nearby:
- Review snippets or star rating
- Logos of certifications or industries served
- Privacy reassurance (“We never share or sell your information”)
- Typical response time
Trust signals reduce bounce rate and improve submission rate.
8. Track Form Performance with Analytics
You can’t improve what you don’t measure. Reviewing how visitors interact with your form reveals exactly where friction occurs.
What to monitor:
- Abandonment rate per field
- Completion time
- Device type and conversion differences
- Drop-off on file upload or lengthy fields
Tools like Hotjar, Microsoft Clarity, and GA4 form events make this painless.
9. Always Send a Confirmation & Next-Step Message
The experience shouldn’t end at “Thank you.”
Send an automated email that includes:
- Confirmation of files received
- Expected response timeline
- Direct phone contact for urgent orders
- Optional link to portfolio or capabilities page
It prevents follow-up emails like “Did you get my files?” and reassures serious buyers.
10. Test Regularly
Forms degrade over time due to browser updates, plugin failures, and changing customer needs.
Quarterly checks should include:
- Test submissions across devices
- File uploads with large and unusual formats
- Simulated first-time user evaluation
- Speed and UX audits
A broken form can silently destroy your pipeline for weeks if unnoticed.
Laser Cutting Lead Form: Essential and Advanced Fields
Here are the key building blocks.
Essential Elements Every Laser Cutting Lead Form Needs
A strong lead form gives you just enough information to respond quickly and understand what the prospect is trying to get done. These fields keep the form simple, reduce drop-offs, and still give you what you need to qualify the job from the first touch.
What to include:
- Name and Contact Details: You need a way to reach them, so keep it simple: name, email, and phone. No long personal info fields or unnecessary details.
- Project Description (Short Text Box): A brief summary helps you understand the nature of the request without overwhelming the user. Most prospects can explain their need in a sentence or two.
- Material Needed: This quickly tells you if the job aligns with what your shop cuts. Stainless, aluminum, acrylic, mild steel, simple dropdown options work well.
- Preferred Turnaround Time: This helps you judge urgency. It doesn’t have to be precise; simple choices like “ASAP,” “1–3 days,” or “Not urgent” work well.
These essentials make the form fast to complete while giving you the core information needed to reply confidently and assess whether the project is a good fit.
Optional Add-Ons That Improve Lead Quality and Save Time
Once the essentials are covered, advanced fields can give you deeper technical insight without overwhelming the user. These details help your team quote accurately, avoid feasibility issues, and understand the real scope of the job before a single email is exchanged.
High-value advanced fields to include:
- CAD File Upload (Native Formats): Allow uploads beyond DXF or PDF, such as STEP, IGES, or SolidWorks files. Native CAD models provide exact geometry, reduce interpretation errors, and help your team assess cut paths, kerf impact, and manufacturability with precision.
- Tolerance or Precision Requirements: A simple dropdown for “Standard,” “Tight,” or “Critical” tolerances, or a text box for specific notes. This prevents quoting errors and helps you spot jobs that require secondary processes or specialized setups.
- Intended Application: Optional field for use-case context (prototype, structural part, bracket, enclosure, decorative piece, etc.). Knowing how the part will function helps your team recommend better materials, thicknesses, and finishing options.
- Edge or Finish Expectations: Options like “clean cosmetic edge,” “standard cut,” “no discoloration,” or “ready for welding.” This guides machine settings and helps avoid mismatched expectations.
- Bending or Fabrication Notes: A checkbox paired with a text field for details. This is crucial when flat patterns require bend allowances, reliefs, or weld joints that your team needs to anticipate early.
- Upload Reference Images or Drawings: Let prospects attach supporting pictures, sketches, or sample parts. This often clarifies intent when CAD files are incomplete or when the user isn’t a trained designer.
- Material Substitution Options: A multi-select that shows whether they’re open to alternatives. This helps you recommend better sheet stock options you already carry, reducing delays and material waste.
- Prototype vs. Production Indicator: An optional selection lets you plan for the right workflow. Production-run leads often require nesting considerations, tooling decisions, or recurring schedule planning.
- Design Notes or Manufacturing Constraints: A free-text area specifically labeled for technical notes. This is where engineers often add bend radii, hole sizes, hardware details, or assembly constraints that otherwise get lost in email threads.
These advanced fields give you a more complete picture of engineering expectations before quoting begins.
Wrapping Up
A smarter lead form pays for itself. When you ask for the right details upfront, material, specs, and design files, you cut out the confusion and stop wasting hours on dead-end inquiries. Put these simple changes in place, and suddenly high-quality laser cutting leads feel less like a chase and more like a steady flow of real opportunities.
More clarity. More accuracy. More closed deals.
If you want better leads, build a better form.
.webp)


.webp)


.svg)


